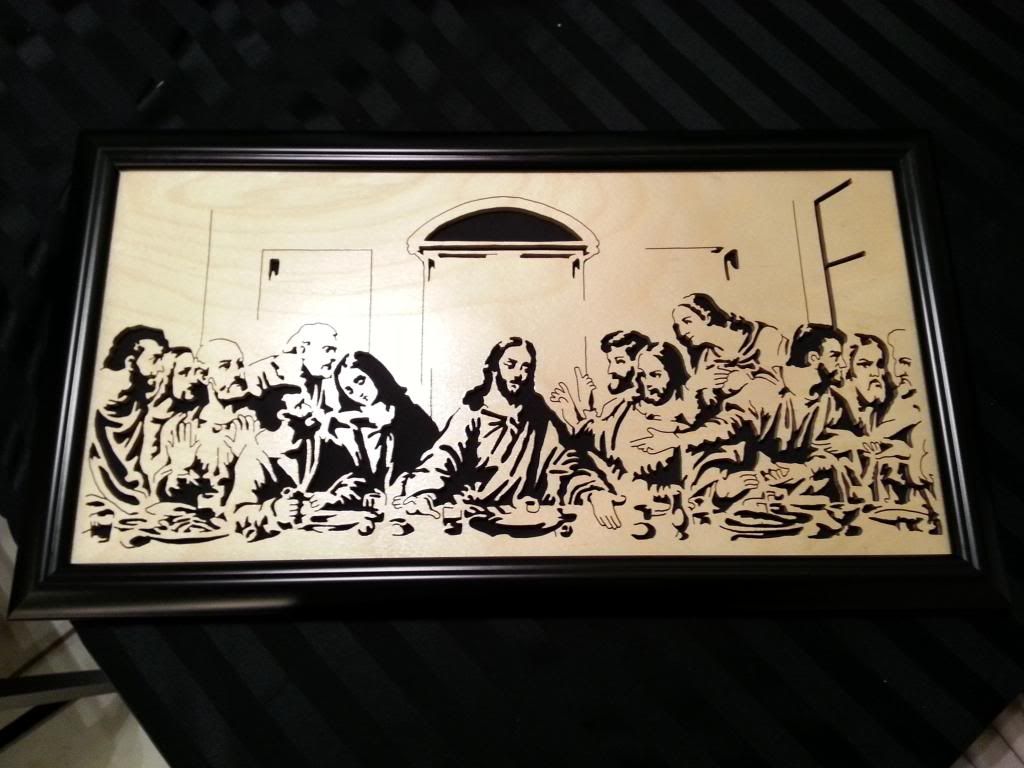
I made this.
Comments
-
Awesome inlay work! My granddad did marquetry and scroll work for years. I am pretty comfortable with the scroll saw but my first inlay piece caused a lot of frustration and ended up in the scrap bin.jlmarta:I've been a woodworker for years and like many forms of it but my favorite has to be woodturning. Second would be things like inlay work. My stepson retired from the post office and over the years he collected a few antique P.O. box doors. He asked me to build some sort of display case to show the doors off. I made this for him for Christmas one year.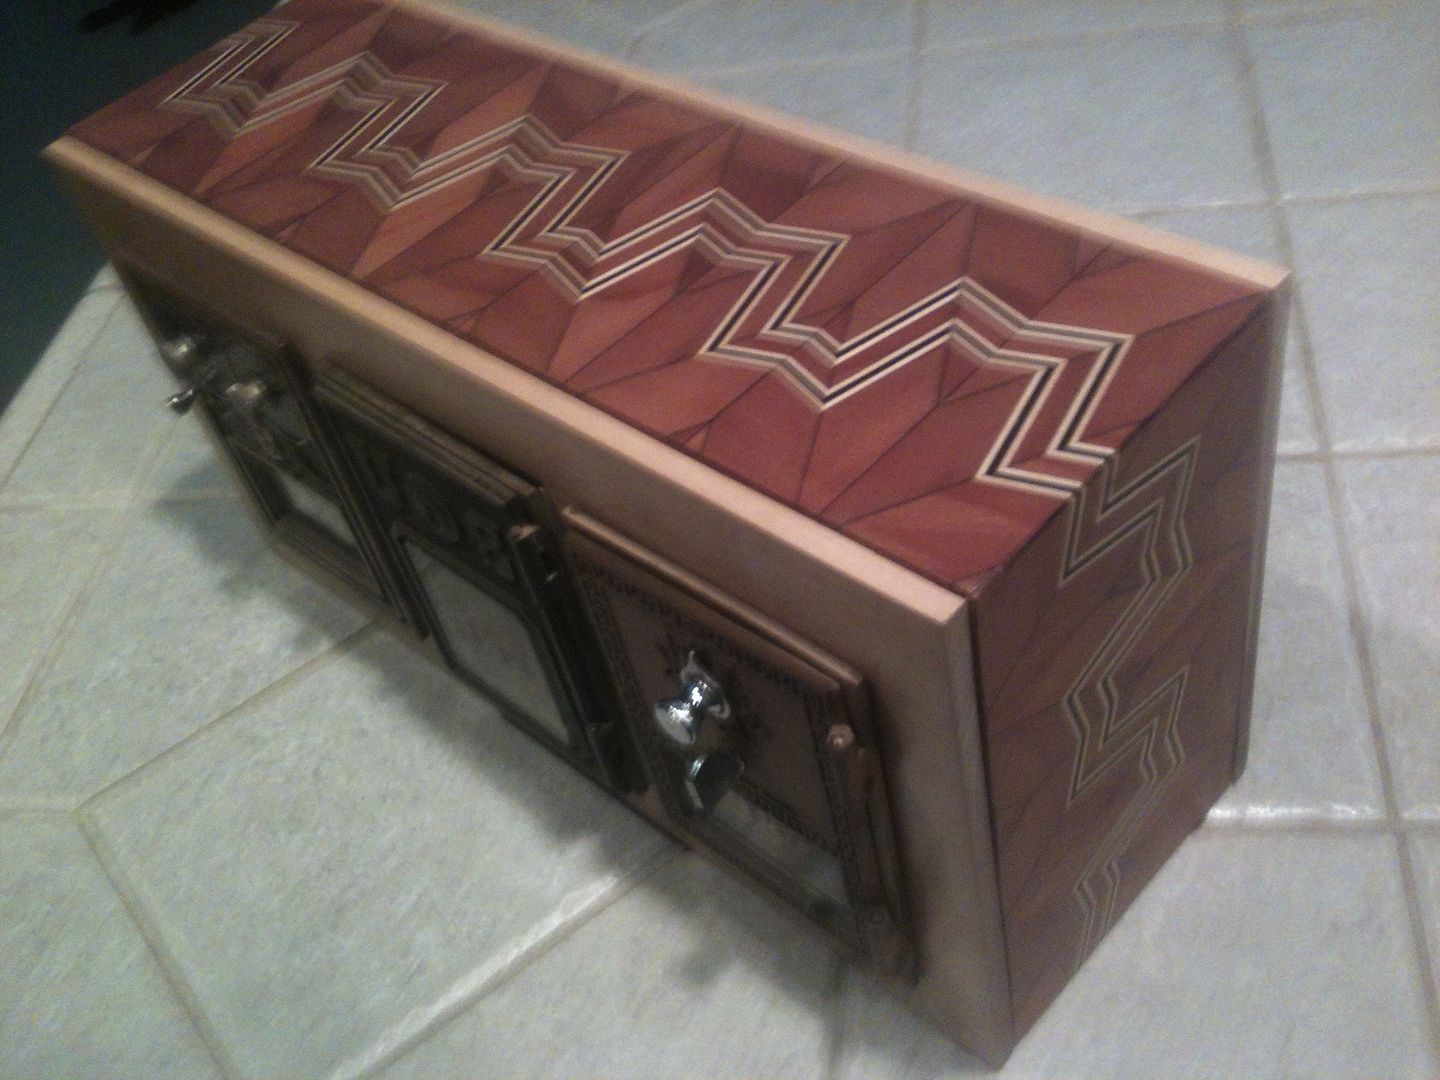
The front and rear panels are of cherry and are jointed into the case in a free-floating manner so as not to break a glue joint should they expand due to moisture/ humidity. The darker wood is redwood and the inlaid stripes are of sycamore and black-dyed pear wood.0 -
lonewolf2011:
It's 10x20. After a couple more portraits I want to try doing a large fretwork clock if I can find the time.jlmarta:
I think it's a great job. Especially the fine detail, like the hands for example. If it were a larger piece I think that detail becomes easier. A fretwork clock should be a piece of cake for ya....0 -
lonewolf2011:
Awesome inlay work! My granddad did marquetry and scroll work for years. I am pretty comfortable with the scroll saw but my first inlay piece caused a lot of frustration and ended up in the scrap bin.jlmarta:I've been a woodworker for years and like many forms of it but my favorite has to be woodturning. Second would be things like inlay work. My stepson retired from the post office and over the years he collected a few antique P.O. box doors. He asked me to build some sort of display case to show the doors off. I made this for him for Christmas one year.
The front and rear panels are of cherry and are jointed into the case in a free-floating manner so as not to break a glue joint should they expand due to moisture/ humidity. The darker wood is redwood and the inlaid stripes are of sycamore and black-dyed pear wood.
Thanks for the kind words, my friend....0 -
jd50ae:This is the type of stuff my wife makes. She has sent a number of prayer feathers to the troops.

She does nice work, man, and I'm sure the troops appreciate the prayer feathers. My mother is a fiend over anything Native American, she'd love something like those ear rings. PM me some prices if you don't mind.0 -
Bump for Irish and cause it's a good thread that needs a good bump0
-
Some amazing projects in here for sure, and Rob you've been holding out on me man you kept saying how it's not a big deal what you make but that's a lie those are some amazing projects bro and you are wicked talented! Love that tool chest that's insane!!0
-
Thanks Brett. I look forward to the day my kids are older and my shop is a saw dust factory again and not a storage ware house for crap we don't want sitting in the house0
-
Hey Walt, how about some pics of the BFH in here. I know you posted the build once before but this seems like a good place for it0
-
Well, since somebody awakened this thread, I'll post a photo of a project I was finally able to finish after the long recovery period after my surgery. I started the project in mid-2012, just before I was diagnosed with cancer. It's a boardroom cigar ashtray I was making for The Sniper to repay a huge favor.
I had gotten the bowl portion of it turned and finished but hadn't yet machined the stirrups into it. With my diagnosis and the upcoming surgery in the way, the bowl sat on my coffee table looking like a nut bowl until late last year. That's when I felt that I had enough of my old stamina back to go ahead and finish it in time to ship it to him for Christmas.
I took some photos along the way as work progressed but here's a shot of the finished project: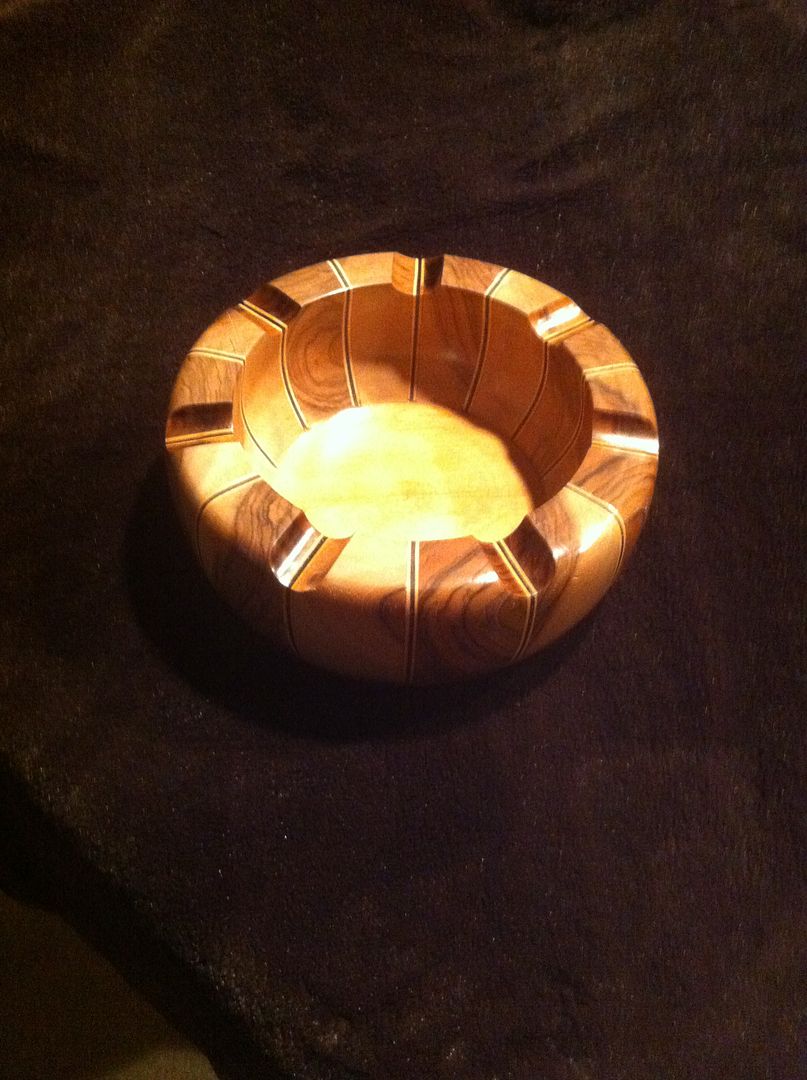
The base is made of cherry, the segments are walnut - sapwood and heartwood - and the stripes are of sycamore and black-dyed pear wood.
0 -
Marty you do some incredible work, what a treat to see your handiwork and even more of a treat to hear you are feeling not only better but stronger with more stamina too! You do truly inspired work there and the fact that it went to Glen is even cooler, thanks for sharing my friendjlmarta:Well, since somebody awakened this thread, I'll post a photo of a project I was finally able to finish after the long recovery period after my surgery. I started the project in mid-2012, just before I was diagnosed with cancer. It's a boardroom cigar ashtray I was making for The Sniper to repay a huge favor.
I had gotten the bowl portion of it turned and finished but hadn't yet machined the stirrups into it. With my diagnosis and the upcoming surgery in the way, the bowl sat on my coffee table looking like a nut bowl until late last year. That's when I felt that I had enough of my old stamina back to go ahead and finish it in time to ship it to him for Christmas.
I took some photos along the way as work progressed but here's a shot of the finished project:
The base is made of cherry, the segments are walnut - sapwood and heartwood - and the stripes are of sycamore and black-dyed pear wood. 0
0 -
Beautiful90+ Irishman:
Marty you do some incredible work, what a treat to see your handiwork and even more of a treat to hear you are feeling not only better but stronger with more stamina too! You do truly inspired work there and the fact that it went to Glen is even cooler, thanks for sharing my friendjlmarta:Well, since somebody awakened this thread, I'll post a photo of a project I was finally able to finish after the long recovery period after my surgery. I started the project in mid-2012, just before I was diagnosed with cancer. It's a boardroom cigar ashtray I was making for The Sniper to repay a huge favor.
I had gotten the bowl portion of it turned and finished but hadn't yet machined the stirrups into it. With my diagnosis and the upcoming surgery in the way, the bowl sat on my coffee table looking like a nut bowl until late last year. That's when I felt that I had enough of my old stamina back to go ahead and finish it in time to ship it to him for Christmas.
I took some photos along the way as work progressed but here's a shot of the finished project:
The base is made of cherry, the segments are walnut - sapwood and heartwood - and the stripes are of sycamore and black-dyed pear wood. 0
0 -
-
Jlmatra, very nice!
CBuck looks yummy!0 -
Marty, that is awesome.
Amazing work.0 -
Thanks, guys. I was kinda pleased with it. ??0
-
Very nice work.0
-
I'm so jealous, I have no woodworking skills at all. Very nice work boys.0
-
I can do that. I'll try to remember some time this weekend and get them on here.FireRob:Hey Walt, how about some pics of the BFH in here. I know you posted the build once before but this seems like a good place for it0 -
You can take credit for the organ's closet I sent you.Glock1975:I'm so jealous, I have no woodworking skills at all. Very nice work boys.0 -
Sorry I didn't get to this sooner. For simple's sake, I just copied my code from the original post on my BFH.WaltBasil:
I can do that. I'll try to remember some time this weekend and get them on here.FireRob:Hey Walt, how about some pics of the BFH in here. I know you posted the build once before but this seems like a good place for it
Thought I'd share this with you all. I started this project back in December of 2012 and had it operational in July, technically completed in August. Building it was easier than I expected. The detail is the hardest part.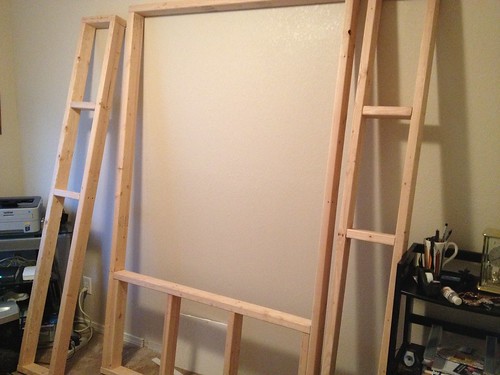
These are the frames I built for the front and sides.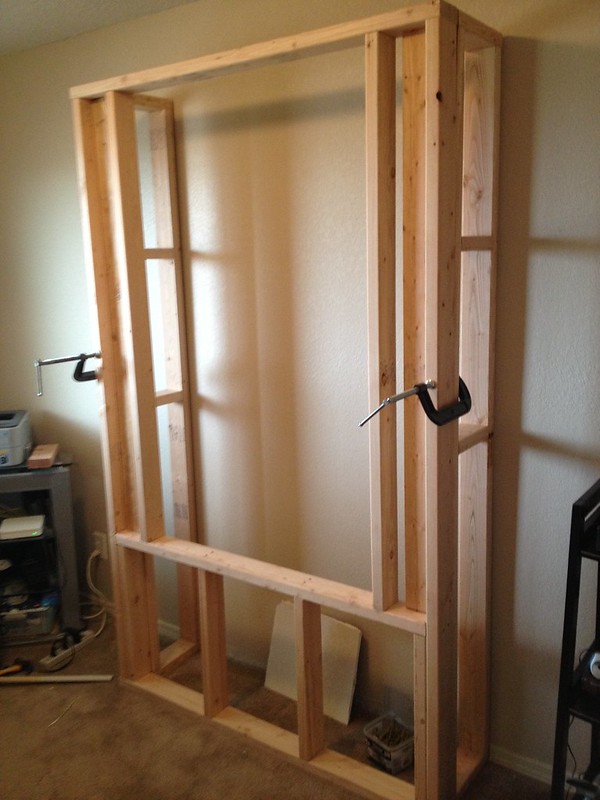
Frames are clamped so I can determine how much of the carpet to remove.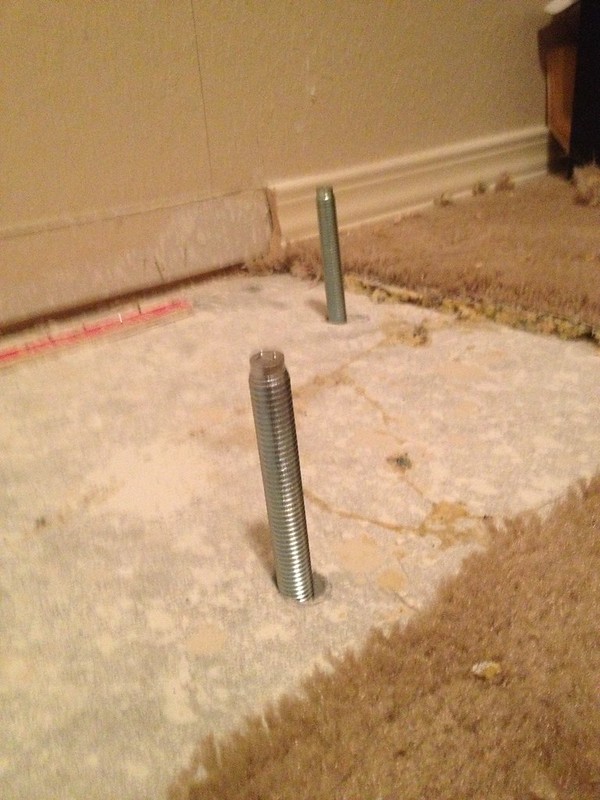
Carpeting removed. Holes drilled for anchors. Anchors installed.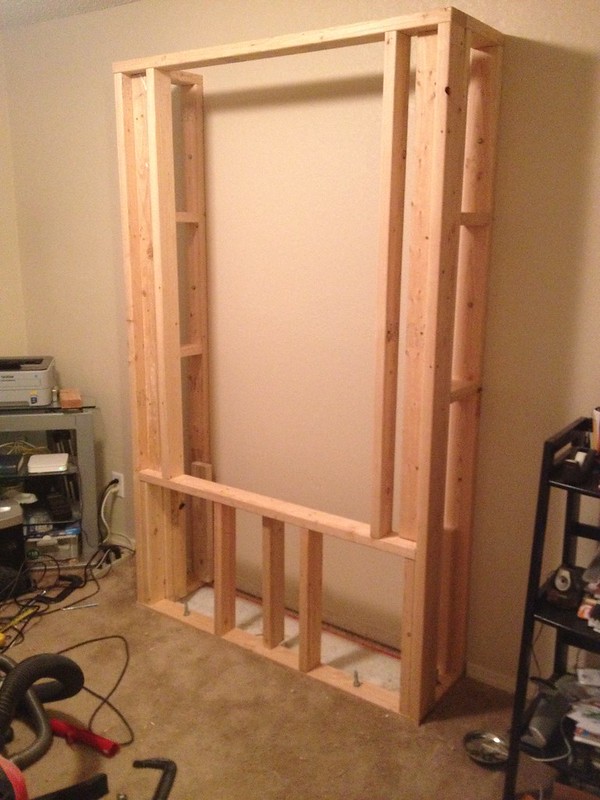
Frame put together and mounted to floor anchors. Bolted to wall studs in the back.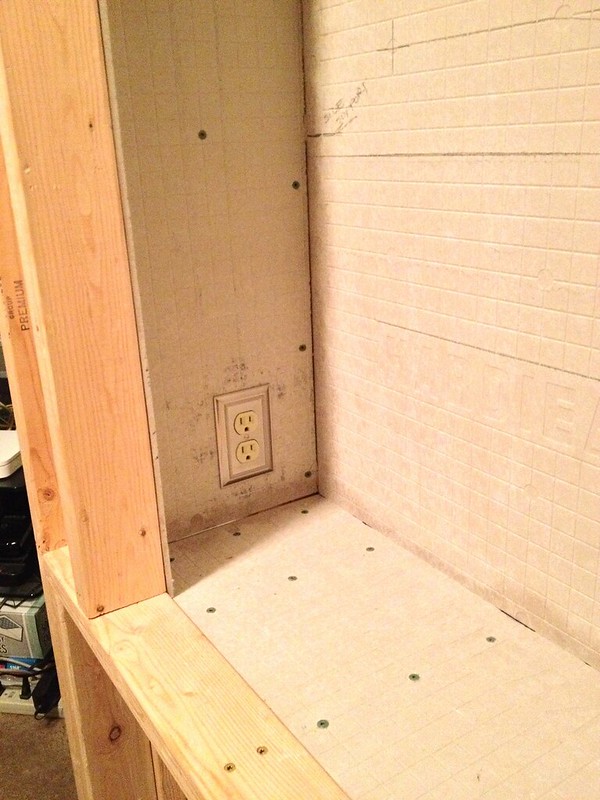
Cement backerboard is used for the moisture barrier. Silicon seal (for bath and tubs) used in all the seams. Electric outlets on each side at the bottom. This particular outlet is always powered (for the humidifier), the one on the right side will be on the same switch that powers the interior lighting (if further interior lighting is wanted in the future).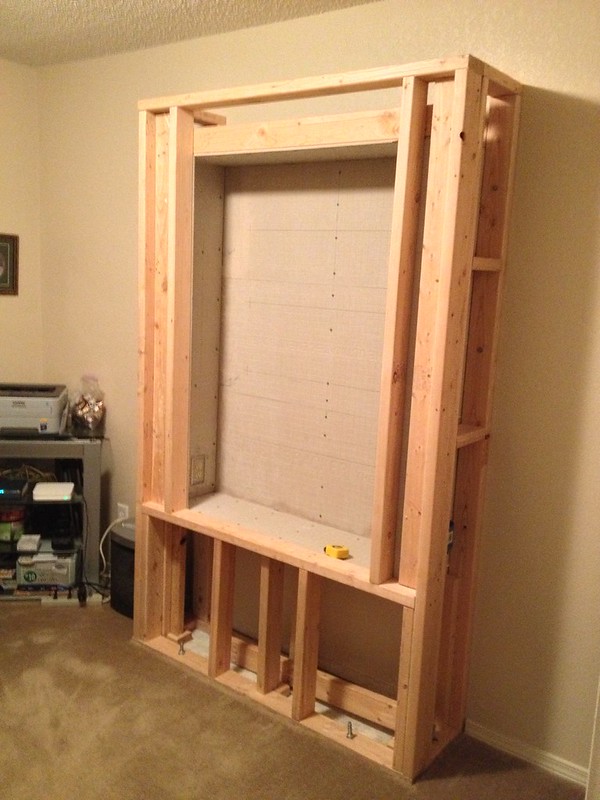
Step away view of cement backer inside.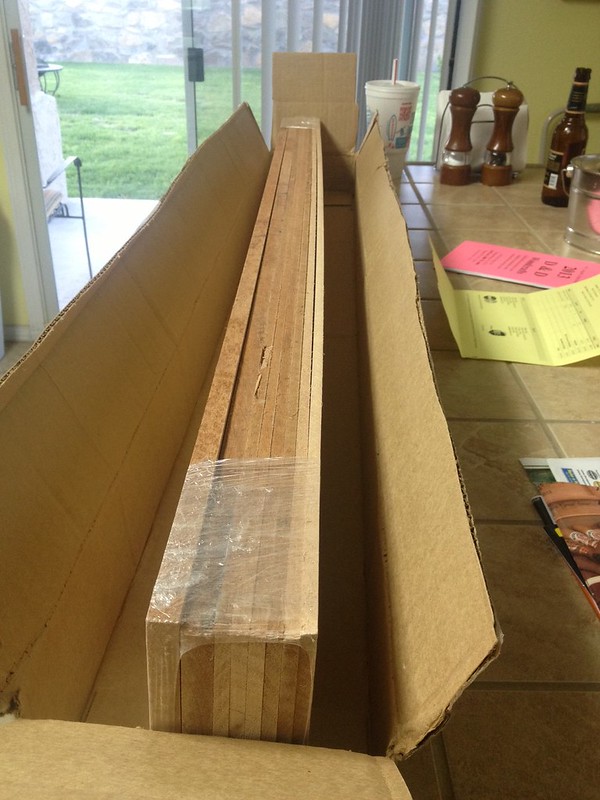
One of my shipments of Spanish Cedar. 1/4 inch thick. 4 foot boards. some 3 inch, some 5 inch wide. I cut them into 1 foot tiles and bevel a 45 degree edge all around. There is also some half inch thick boards that I will use to make half inch square poles. These will be the corner seams and support for the shelves.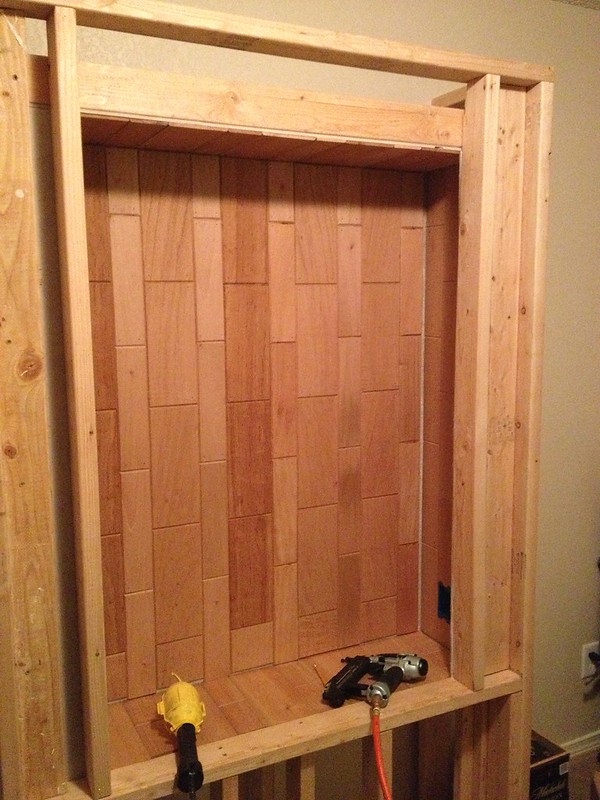
The Cedar tiles are then mounted offset. The beveled edge I routed into them really make them all stand out on their own.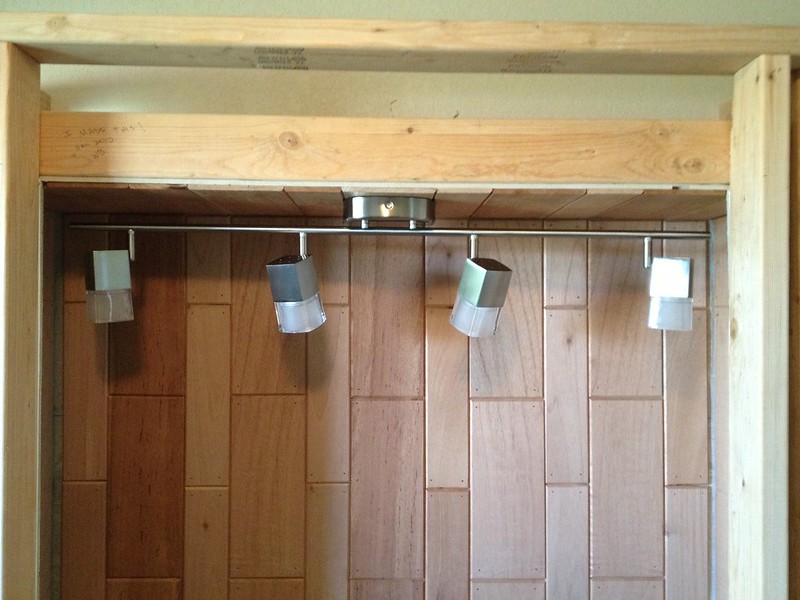
Interior lights are installed. Original lights I had planned were like heat laps at a fast food restaurant. Good thing I decided to try them out prior to installing. Original plans called for recessed lighting, but I couldnt't find any with LEDs that I liked. These turned out beautiful I think.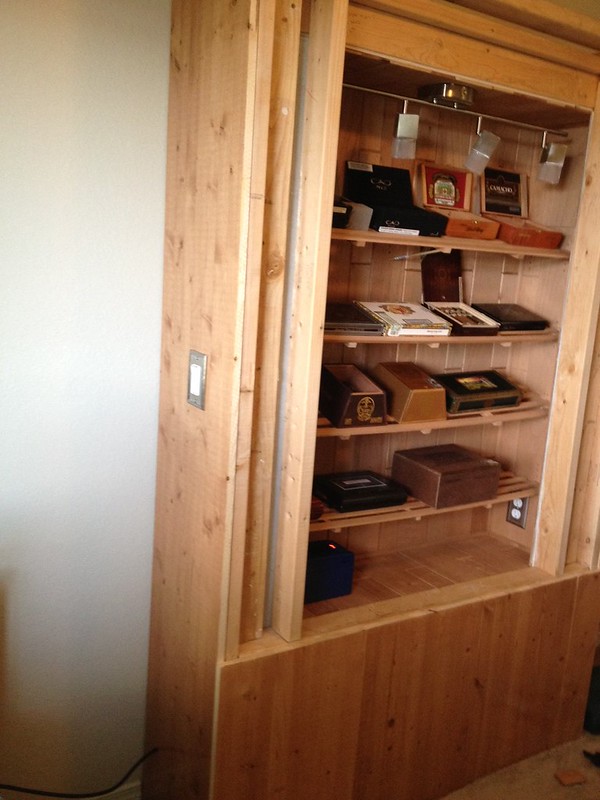
Shelves made and installed. Each is capable of being moved up or down about 5 inches. If you look close, the corner seams are now filled in with the half inch square poles. Exterior wood (pine) is stained, finished, and mounted. Power switch for the lights on the left side. Boxes thrown in to see what it might look like one day. Humidifier in the lower left.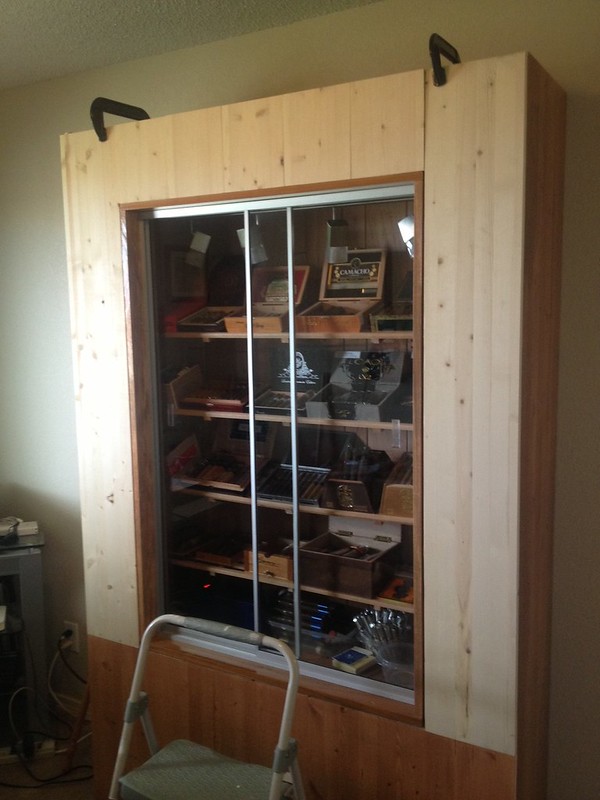
I had a local glass company custom make me some sliding glass doors. Once I had them, I built a frame they would fit into, mounted the frame into the humidor. Mounted the glass. Clear silicone seal placed around the aluminum frame on the inside. Weather stripping mounted inside the glass door jams. More weatherstripping attached to the outter glass pane that makes rigid contact with the inside pane. After about a week, humidity stays at 75 at the bottom and 66 at the top. Installed an additional fan (runs constantly) for better circulation and I achieve 75 bottom 69 topside. At this point it is fully functional and I begin using it. Pre-finished exterior wood clamped on. Time to finish this puppy!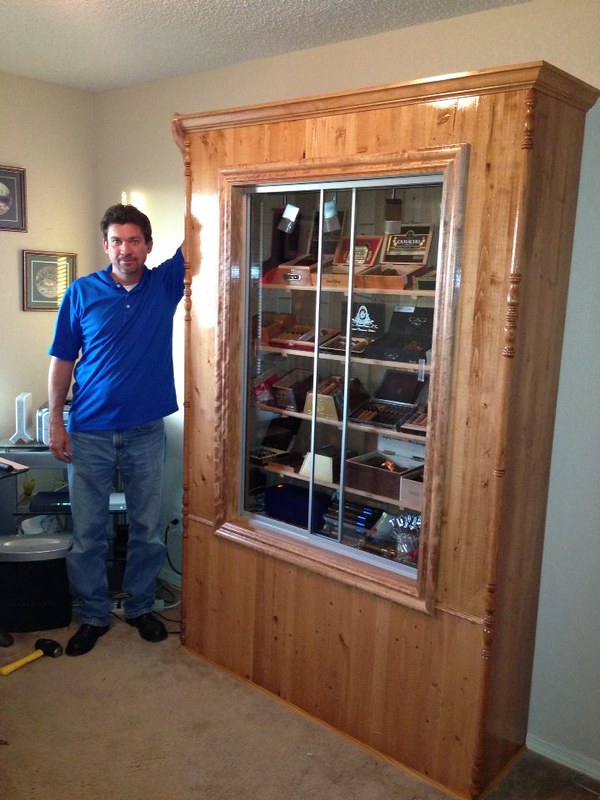
Finished Product! Trim applied all around the exterior to hide the seams mainly - but also makes it look kind of fancy. Insert Tim the Toolman's "Oh Oh" here.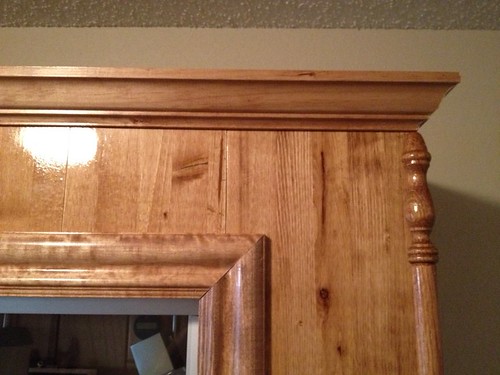
Close up of the upper trim.
I can't take credit for the staining and finishing. My lovely wife did all that. She loves to stain. I don't. Perfect team.
0 -
That's a beautiful job, Walt. I wish I had done more of that kind of thing in earlier years.
I've never really gotten into this kind of carpentry. The closest thing I've ever done was a queen sized Murphy bed but it was finished out a lot plainer than your gorgeous humi.
A great job by a great BOTL. Nicely done, my friend..... ??0 -
Beautiful finish......every time I see this I get jealous.0
-
I know this isn't up to par with the work I've seen from ya'll but here's a project I recently finished for a client. This used to be the closet under the stairs.
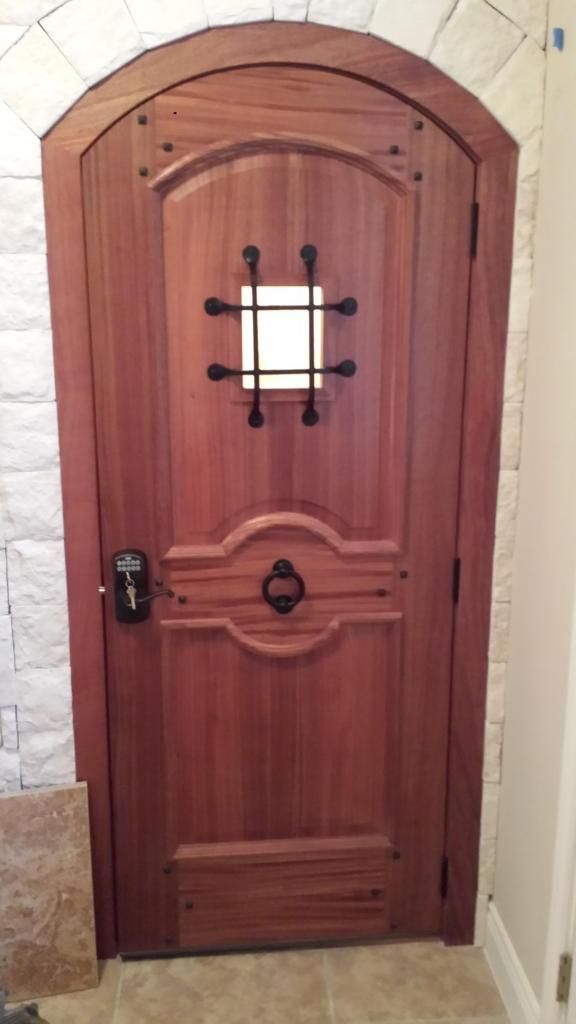
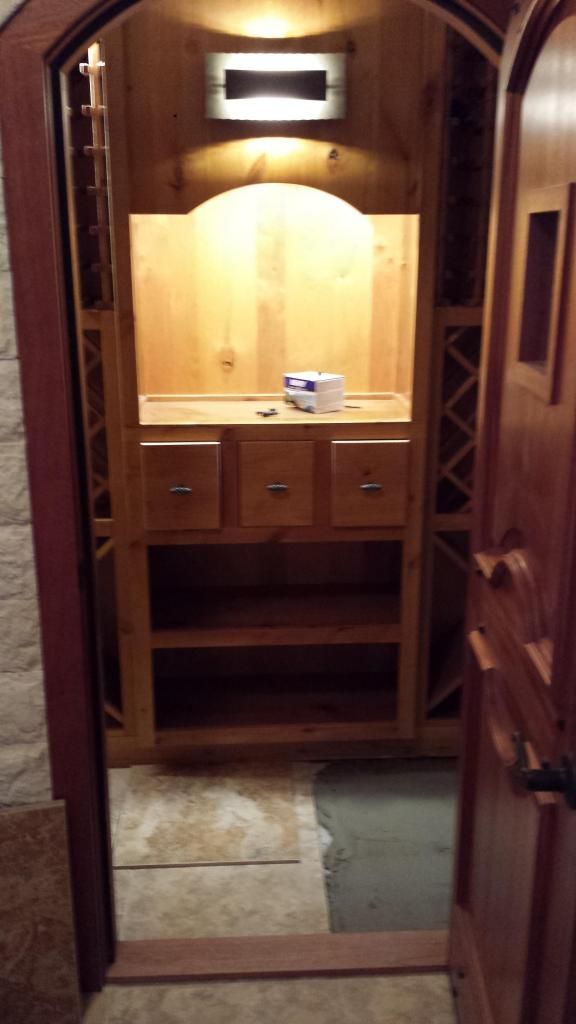
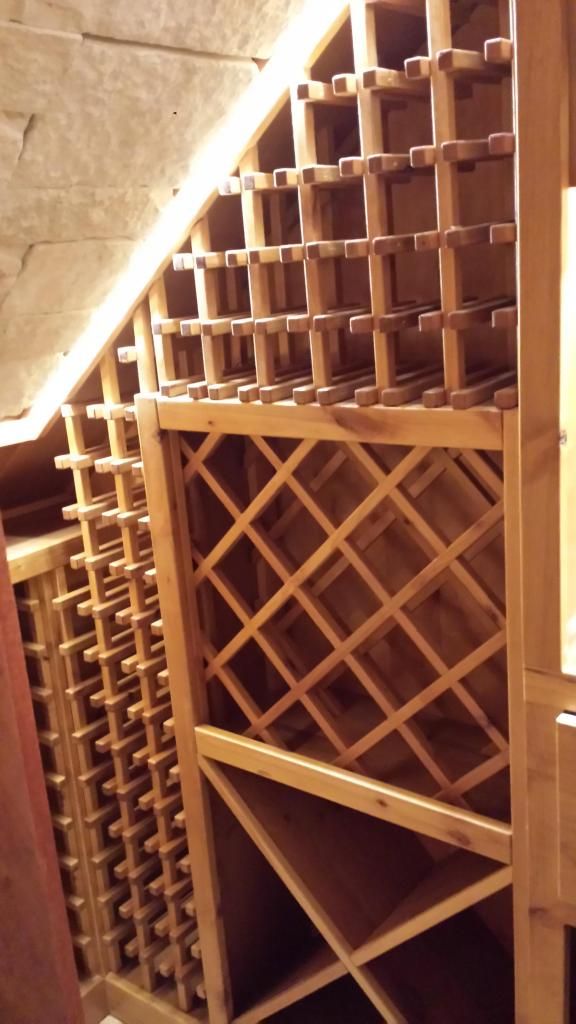
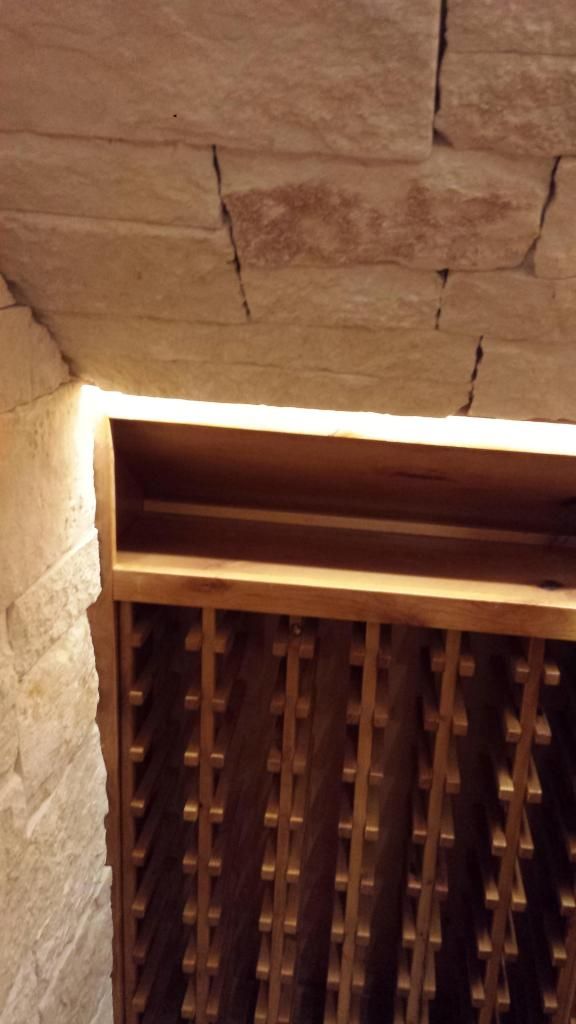
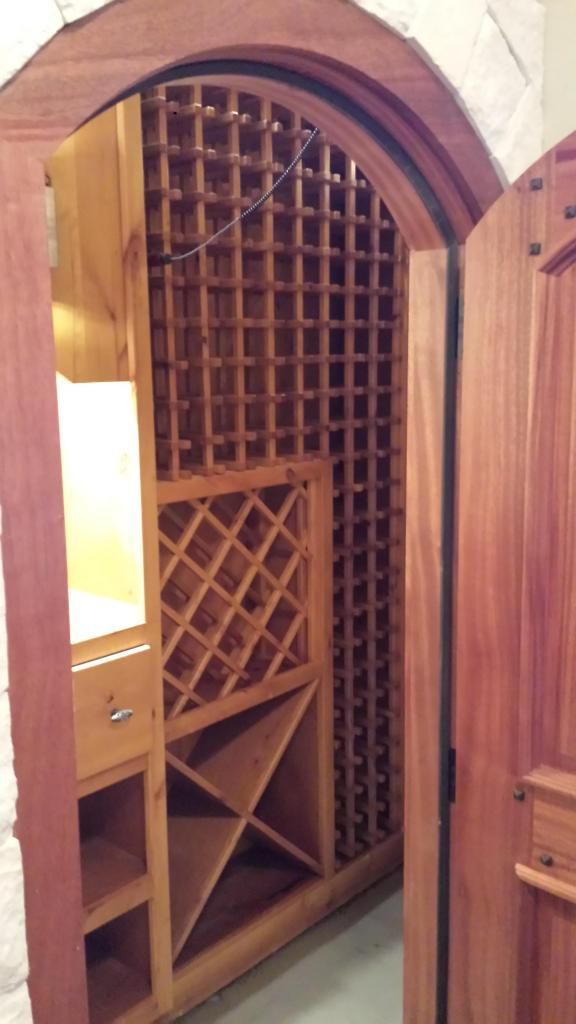
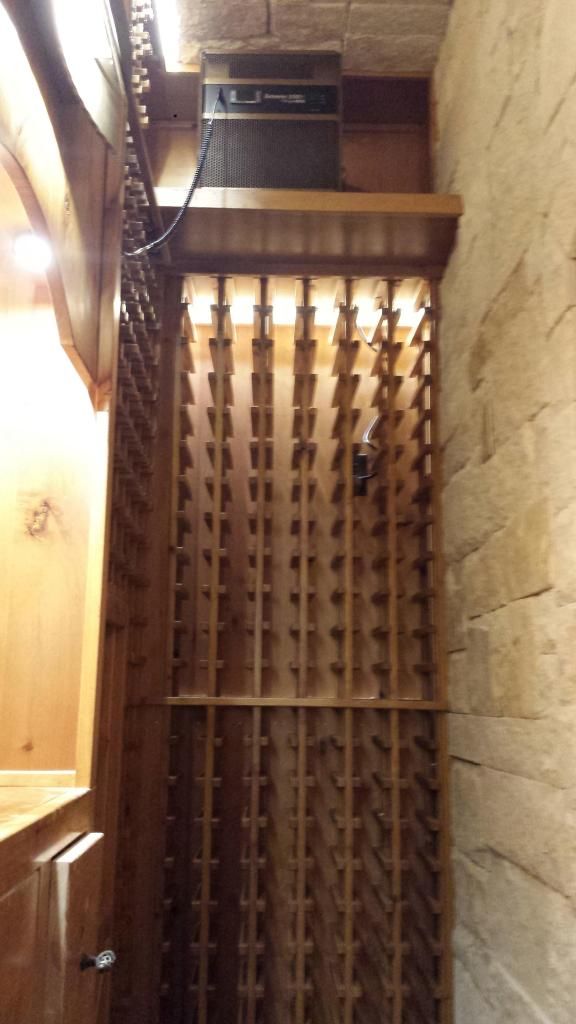
the shelves in the 2nd pic are for humidors 4 100 ct and 1 300 ct for a centerpiece. this cellar will hold 500 bottles and there are over 4000 individual pieces of Maple and 3 tons of limestone.0 -
Is that Morgan's closet? The one I hear so much about? LOL0
-
hahaha... Morgan wishes that were his closet! onestrangeone, that is awesome work. No wonder there's a nice lock on it.cbuck:Is that Morgan's closet? The one I hear so much about? LOL0 -
ok send me your addy kind sir. It's time to kill these closet jokes once and for all. Every time I hear a closet joke from someone they will automatically be on my list!cbuck:Is that Morgan's closet? The one I hear so much about? LOL 0
0 -
So, you got lists too? Awesome!0
-
I'll show you mine if you show me yours! How about a trade? Need addy soon though, as I'm off to vacation tomorrow. I can ship in the morning before I leave.MorganGeo:
ok send me your addy kind sir. It's time to kill these closet jokes once and for all. Every time I hear a closet joke from someone they will automatically be on my list!cbuck:Is that Morgan's closet? The one I hear so much about? LOL 0
0 -
double post0
-
Dude that is amazing work!!!! What a neat idea number one but holy CHITE did you pull that off beautifully!0

